The Rear End We Actually Needed: 6 Monkeys High-Clearance Bumper
Cutting the WK2 rear fascia, keeping the parking-sensor loom intact, and dialing in a reinforced 37-inch spare carrier on Jon's Granite Grand.
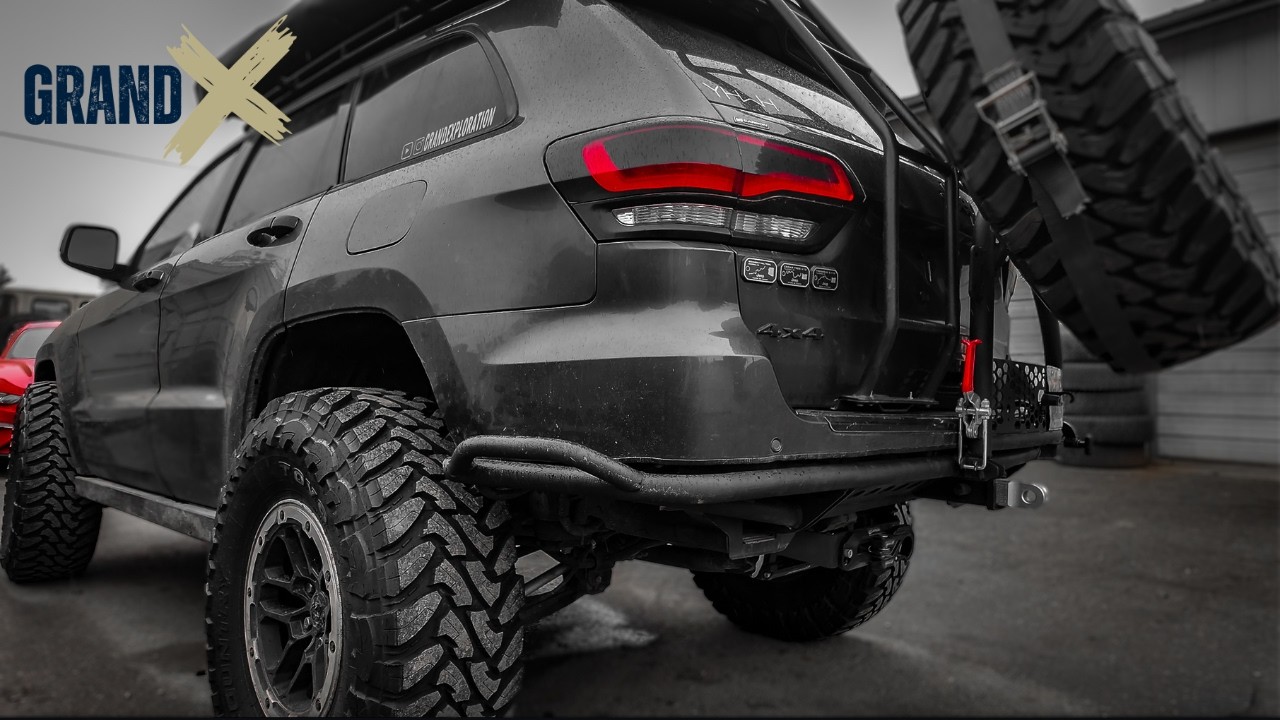
The Granite Grand had already outgrown its rear bumper. We had trimmed away factory plastic for departure clearance, hung a 37-inch spare on a hitch-mounted carrier, and tucked a 12K rear winch underneath. Every change worked, but the back of the Jeep was becoming a collection of compromises.
The 37 was the biggest one. The old 6 Monkeys hitch-mounted swing-out carried it, but it never felt like the final solution for that much weight.
Daniel at 6 Monkeys Off-Road built a reinforced high-clearance tubular rear bumper with an integrated tire carrier for this Jeep. He strengthened it for the 37 and added side kickers, a custom detail that wasn’t part of the regular website configuration at the time. The job now was to make that bumper, the factory body, the sensors, the winch and the spare tire coexist.
We did the installation at Josh’s house, with Josh from Out of the Woods Adventures helping with the work. Here’s the part we’d want on the workbench before cutting anything.
First, clear the hitch and save the wiring
The bumper attaches at the WK2’s factory rear hitch mounting structure. We removed the original hitch fasteners, three bolts per side. A 13/16-inch socket was used on the hitch hardware in this installation. The already-installed rear winch made access more involved than it would be on a stock Jeep; it shares this part of the structure.
The lower plastic trim had to come off next. Some clips released normally; others snapped as soon as they were asked to move. We also unplugged the trailer-light connection and removed the original hitch component to open the work area.
Do not start cutting the bumper while the rear parking-sensor harness is still strung across the plastic you’re removing. The sensor bodies can be freed from their retainers without cutting the wiring. We pulled the loom back toward the driver’s side to protect it and get the lower fascia out of the way.
The two center rear sensors and passenger-side corner required attention because of how the shared loom routed across the bumper. The other corner sensor could remain in place during this process. Once the swing-out occupies the middle of the rear end, the original center-sensor positions are not unobstructed anyway. We kept the wiring intact rather than hack it off.
The kit also provided wiring accommodations for the license-plate light and a rear camera. Jon already used a Wolfbox rear camera, so we did not turn this particular install into a full factory-camera relocation project.
The irreversible part is the cut line
The new steel bumper isn’t designed to sit beneath an untouched stock fascia. The lower section of plastic has to go.
6 Monkeys included a paper trimming template. We positioned it on the rear of the Jeep, paid attention to getting its upper edge level, and traced the line with a marker. The body curves fight the template; it takes deliberate alignment to avoid cutting too high on one side.
Then we removed the excess lower plastic. This was not a cosmetic change. It exposed the space needed to tuck the tube bumper up where the stock bodywork used to hang.
After the cut, we installed the supplied edge trim over the raw plastic. Near the rear arch, part of the metal needed a few relief cuts and flattening, similar in principle to a pinch-weld clearance modification.
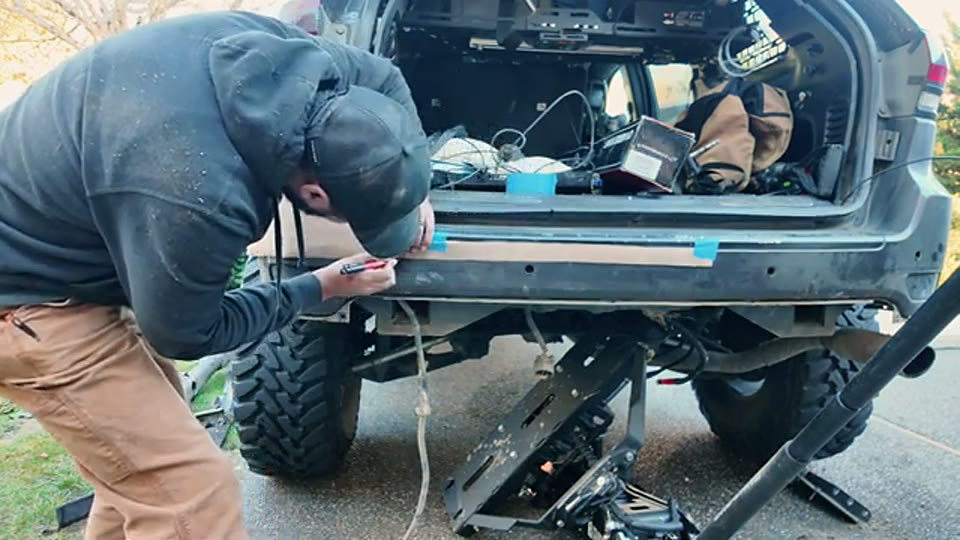
The practical rule here is to cut to the template, test-fit, then trim the edge to suit. The new part determines the shape. Once the factory bumper is on the ground, there is no undo button.
A 37-inch swing-out is really a pivot and latch project
The bumper itself is only half the installation. The heavy spare needs to open without sagging, stay put when it’s open, and lock closed without a wrestling match.
The carrier uses a vertical spindle with bearings, a castle nut, cotter pin and protective top cap. We fitted the arm onto the spindle and arranged the bearings in the order and orientation shown in the supplied hardware. Jon was given about 80 ft-lb as a starting reference on the castle nut, then adjusted the resistance so the carrier moved smoothly but didn’t flop freely.
That is an installation-specific starting point, not a blanket bearing-preload specification for every version of the kit. The final check was how the arm moved and whether the cotter pin could secure the correctly adjusted nut.
The indexed swing stop is controlled by a lever and a small T15 set screw. With the arm properly seated, we fitted and secured that mechanism so the carrier could hold in its intermediate positions rather than swing back toward the body.
Set the latch with the tire carrier closed
The U-bolt catch is adjustable, and it’s easy to get the carrier almost right. Almost right isn’t enough when you’ll open it every time you need the cargo area.
We loosely fitted the catch and its adjustment nuts, closed the swing-out, then checked where the latch lever met the U-bolt. At first it wouldn’t lock fully. We moved the nuts until the lever could swing through its proper range and engage firmly, then tightened the adjustment.
This is where rushing the install costs time later. The catch must be aligned to the closed carrier, not just tightened where it looks good on the bench.
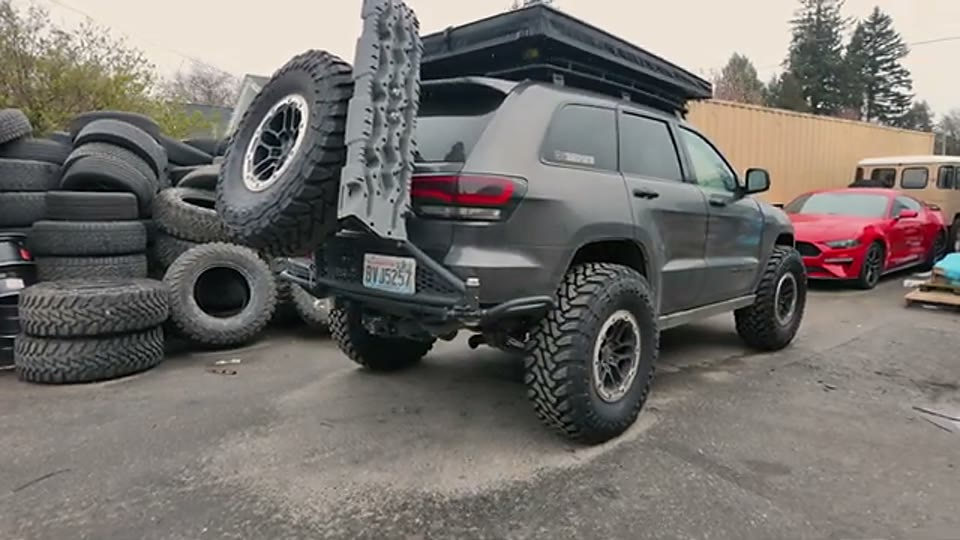
The rear package finally makes sense
The finished bumper sits close to the body, the side kickers guard the corners, and the spare has a carrier designed for its size. More important, the carrier opens, holds position, and latches correctly. The rear winch remains underneath the same part of the Jeep.
We hadn’t taken the freshly installed carrier through Moab at the end of the build, so that was the next durability test. But the installation decisions were settled: the bumper, winch, spare, sensors and camera would be treated as one rear-end system, not five unrelated accessories.
If you’re doing this on another WK2, sort out the rear winch and camera plans before making the irreversible fascia cut. It is far easier to package everything together than to keep modifying the same rear crossmember.
Bench notes for another install
- Bring the supplied cutting template, a good marker, and trim for the exposed edge.
- Preserve the parking-sensor loom even if the original sensor positions won’t be reused.
- Expect the existing rear winch and hitch arrangement to change the amount of disassembly.
- Check swing-arm bearing preload and the indexed stop before mounting the spare.
- Adjust the latch catch with the arm closed, then lock the nuts after the lever fully seats.
- Confirm the kit’s current hardware specifications with 6 Monkeys; our reported castle-nut figure was an installation reference, not a universal torque chart.